Anchor Bolts for Construction: A Step-by-Step Guide to Choosing, Installing, and Buying (Ferry International)
Anchor Bolts for Construction: A Step-by-Step Guide to Choosing, Installing, and Buying (Ferry International)
Why this guide matters (in real site conditions)
Anchor bolts transfer tension and shear from base plates, frames, rails, and machines into concrete or masonry. If the anchor type doesn’t match the base material—or if installation habits are weak—capacity drops, fixtures loosen, and jobs slip. This guide explains why selection matters, when to choose each anchor family, how to install and verify, and what to buy so the right material shows up the first time.
The quick answer most teams need
For fast decisions on typical jobs:
Solid concrete (RCC): choose wedge anchors.
Brick/hollow / AAC: choose sleeve/shield anchors (use the long pattern in hollow/AAC).
Outdoor/industrial: specify HDG; coastal/chemical: specify SS316 (SS304 for moderate).
Near edges/corners: increase spacing, reduce torque, use larger washers/plates.
Unsure substrate: perform one trial fixing (a quick pull test) before bulk installation.
If this solves your case, you’re done. If not, keep reading for the full “why / when / how / buy” logic.
Understanding the anchor families
Cast-in anchor bolts (J/L/U/plate types). Placed in fresh concrete; ideal for structural columns and known base locations during the pouring process. Highest predictability when set correctly.
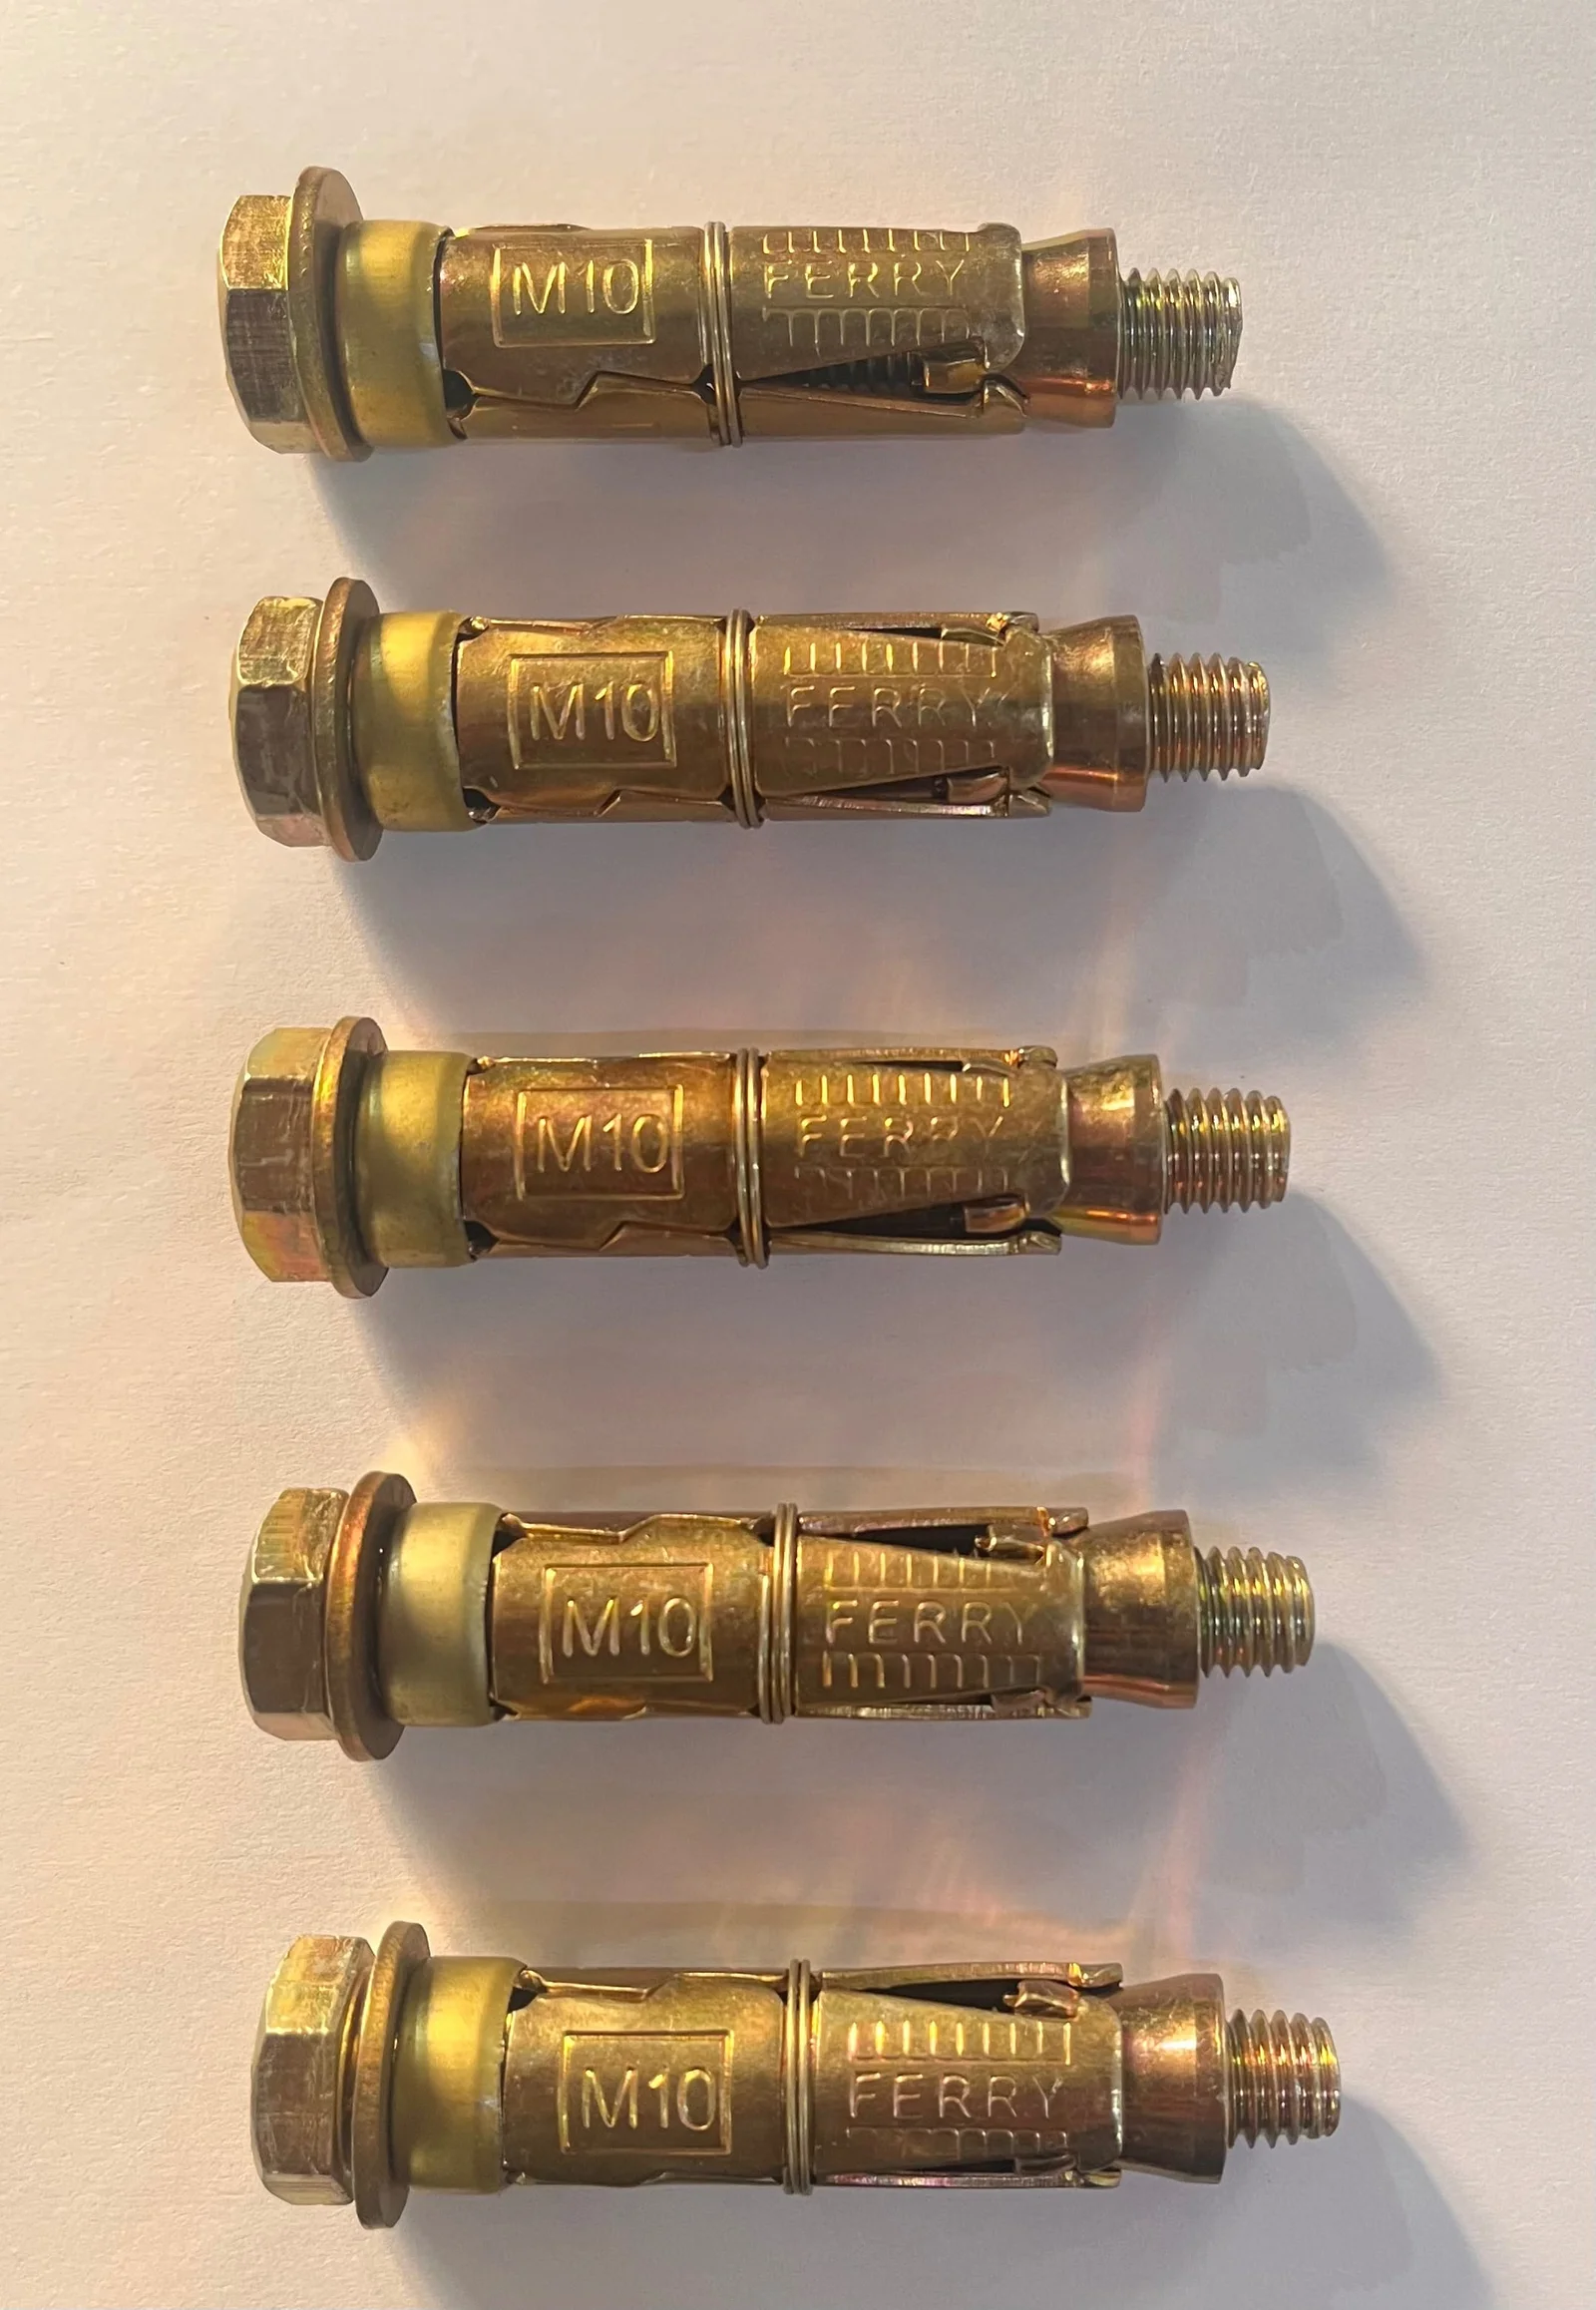
Wedge anchors (post-installed). Designed for solid concrete only. Tightening draws a cone that expands a clip—creating a strong mechanical lock and reliable capacity.
Sleeve/Shield anchors (post-installed). Designed for brick, hollow block, and AAC. The sleeve expands and spreads the load so brittle or voided materials don’t crack or pull out.
Adhesive (chemical) anchors. Used where you need tight edge distances, cracked concrete performance, seismic retrofit, or rebar dowels. They demand design checks, hole hygiene, and curing control.
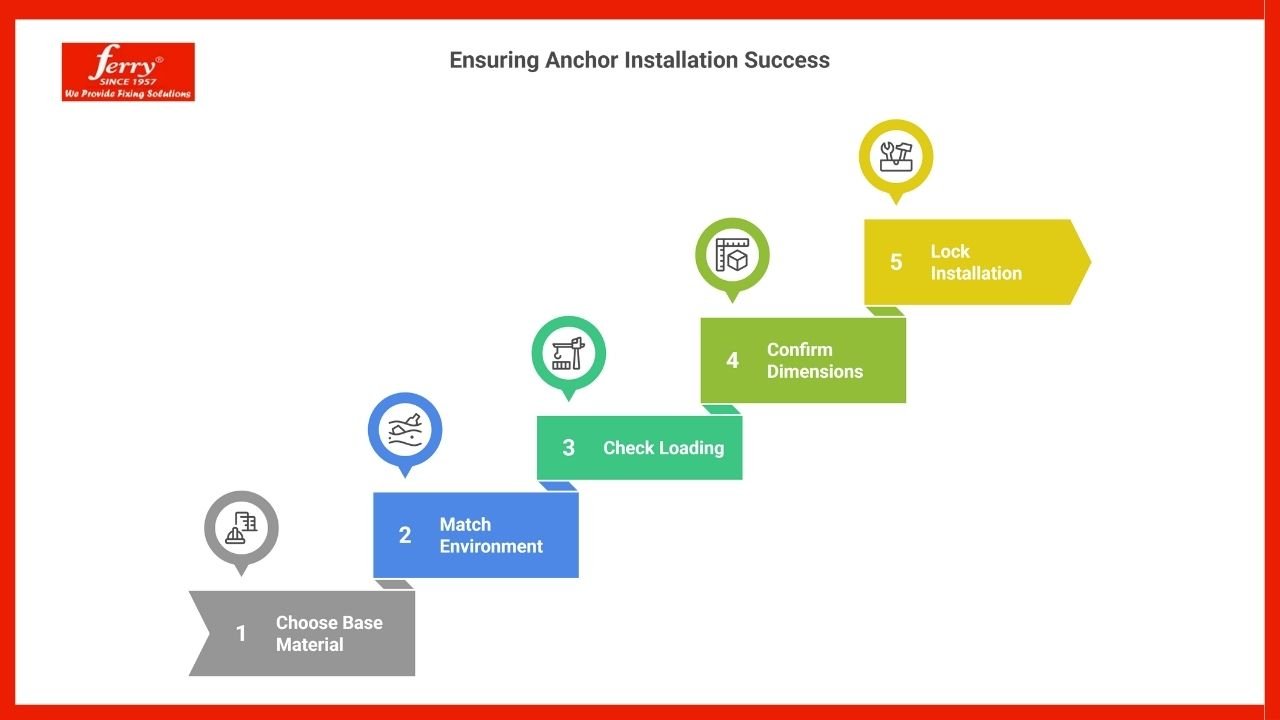
Choosing the right anchor: the Ferry decision framework
1) Start with the base material (this decides almost everything)
Solid concrete (new/old, cracked/uncracked): start with wedge anchors; confirm edge distance, slab thicknes s, and torque. If edges are very tight or concrete is cracked/seismic, consider adhesive anchors with design checks.
Brick/hollow/ AAC: use sleeve/shield anchors. Pick longer patterns for hollow/AAC so the anchor grips across the shell. Drill accurately, tighten gradually, and proof-test a sample in old or variable masonry.
Natural stone / unknown density: always test a trial hole first—density varies and capacity is not uniform.
2) Match the environment with the correct coating (finish)
Finish drives lifecycle costs more than most people expect. Paying for HDG/SS316 upfront is cheaper than repainting or replacing corroded fixings during operation.
Environment
Finish to specify
Typical use
Indoor, dry
Zinc-plated carbon steel
Shops, interiors
Outdoor/industrial
Hot-Dip Galvanized (HDG)
Rooftops, plants, utilities
Coastal/marine/chemical
Stainless Steel 316
Salt spray, washdowns, chemical zones
General outdoor (moderate)
Stainless Steel 304
Facades, open corridors
3) Check loading and service conditions
Static loads: follow typical embedment and torque.
Vibration / thermal cycling: record torque and re-torque after 24–48 hours (pumps, compressors, rooftop equipment). Paint-mark the nut, washer, and plate so movement is visible at a glance.
4) Confirm size, embedment, spacing, and slab thickness
These rules get you very close; then confirm against drawings and fixture thickness (which eats into effective embedment):
")
_1760176205.webp)


.jpg "Anchor Bolt Manufacturers in Haridwar")


.jpg "Brass Anchor Manufacturers Jamnagar Gujarat")


 + Free PDF Download")
 — Grade 8.8")


.jpg "Top Anchor Bolt Manufacturers in India (2026) | Ferry International")


.jpg "Drop-In Anchors for Concrete Fixing")


 Bulk Supplier.jpg "Rubber Lined Split Clamp (Cushioned Pipe Clamp) – Bulk Supply")


.jpg "Sprinkler Clamp Manufacturer in Telangana | Project Bulk Supply by Ferry International")


.jpg "Rubber Lined Pipe Clamp")


.jpg "How to Choose Fasteners for Industrial Projects")
.jpg "Bulk Anchor Bolt Supplier for New Berlin,")
.jpg "Anchor Bolts Supplier for Bulk Orders in South Africa")


